
Sand Casting Aluminum Designs
When starting my new job at Trinity High School in 2018, one of the highlights for me was learning the ins and outs of their Metals Lab. The lab capability that I was most excited about was in the advanced metalworking classes, where students learn to sand caste aluminum molds that they would machine down into precise parts. I knew that I needed to explore this sand-casting procedure myself with a unique design that I could draw up myself.
Fast forward to Summer 2019, I spent a lot of time on my brother’s boat fishing for walleye in lake Erie. During these fishing trips, one of the tools that my brother had on his boat was a walleye holder made from caste aluminum. The tool cost him about $30 and was used to help him hold any fish with sharp teeth as he pulls the fishing hook out from their mouth. This immediately sparked my interest to make my own version of this tool.


Step 1:
Freehand a vector drawing using CorelDRAW
By using the base dimensions of my brother’s tool, I was able to freehand and manipulate precise curves to achieve the shape that I thought best fit. I also drew three separate holes inside of the design to be my future joints on my wooden pattern, knowing that I would have to make it 2-sided.

Step 2:
Create a Wooden Pattern from a CNC Mill
I took the previous design that I drew so I could then create tool paths for a CNC milling machine to cut out. I used the software Vectric Aspire to program these cuts into three tool-paths; Drilling holes, cutting out the insides, and cutting out the parts themselves.

I did have to make some fine adjustments to the drawing so I could compensate with the sand-casting process. Molten metal needs one point of entry for a design, and one “riser” passage for the trapped gases to escape.
I also decided to make this wooden pattern 2-sided in case there wasn’t enough mold relief when I release the pattern from the compact sand (releasing X2 - 3/8” thick sides instead of X1 - 3/4” thick model). Not having enough of a draft angle in your model can make or break a sand-casting.
When understanding draft angles, think of a stack of plastic cups and how the air suction allows them to separate due to it’s draft angle. If the cups that were stacked were 100% vertical (0% draft), they would never release from each other. This principle applies with releasing a wooden pattern from the sand casting.


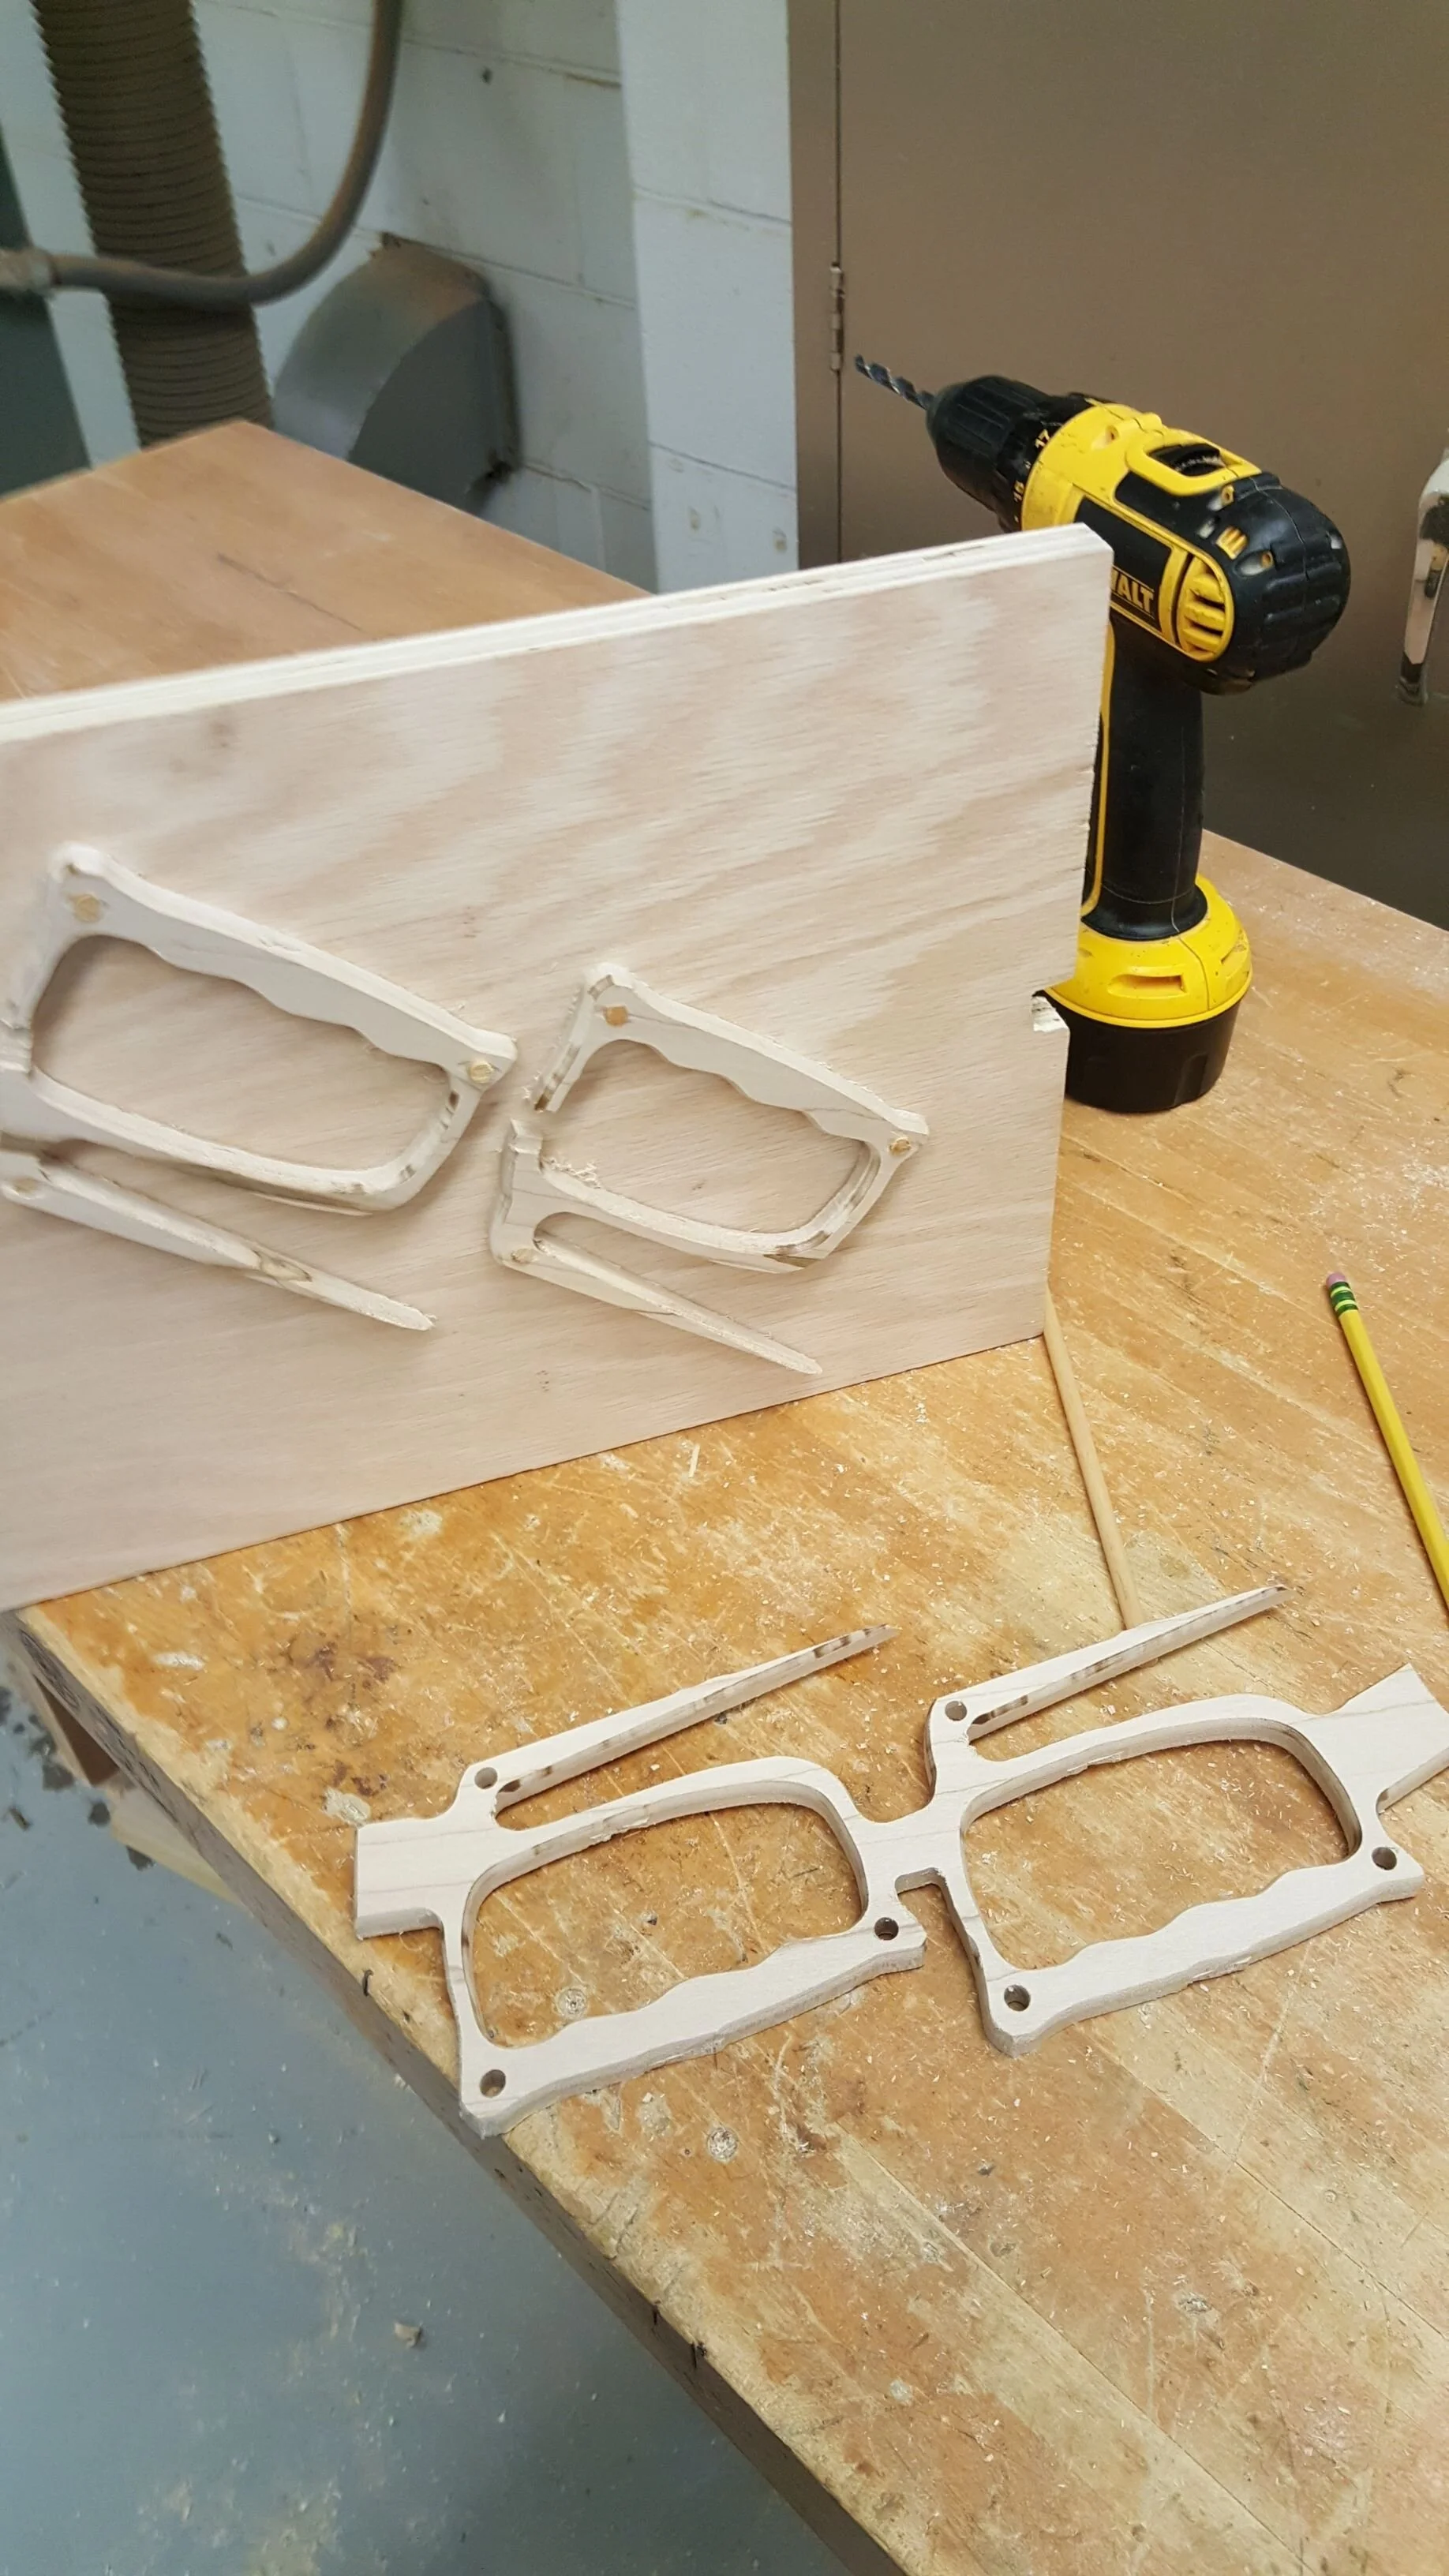

Once I made the plywood piece, I cut out the appropriate notches to fit the flask, and drilled holes to align the wooden model design. I was able to successfully glue dowel rods through both halves of the model, and through the plywood piece itself, securing it all together as one pattern to create X2 fish holders total. To also help with the wood release from the compact sand, I used a caulking gun to seal all of the glued edges, and to form a small radius around all of the joints.

Step 3:
Sand Casting an Aluminum Mold

By using the wooden model design, I was now able to use the flask components shown in the diagram above in order to pack the oil-bonded sand onto the model to create the appropriate sand cavity. I also used brass tubes to create the tunnels needed for the pouring basin (metal entry) and riser (gas exit) shown below.


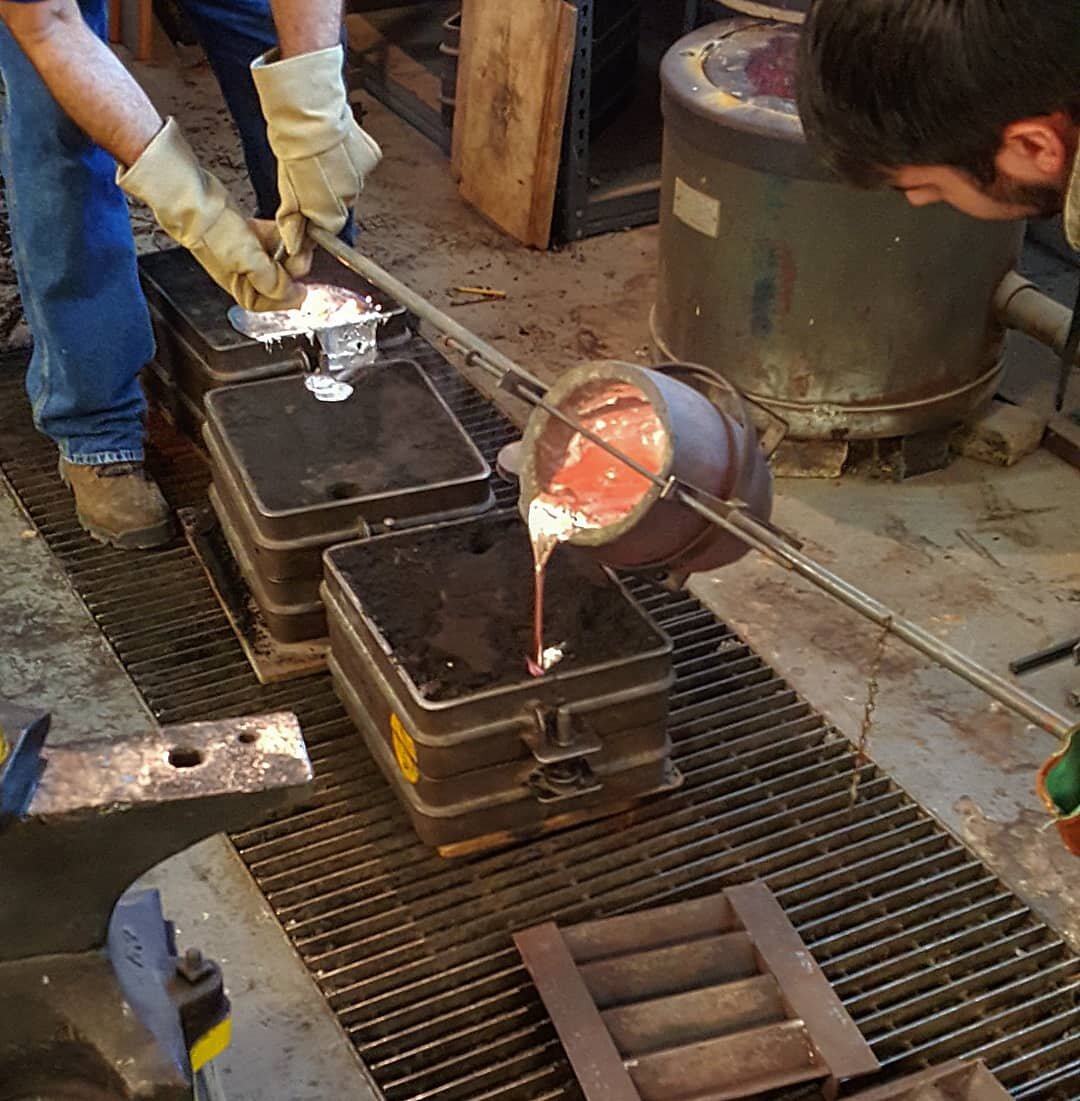


Using a gas furnace, I heated up an aluminum ingot past its’ melting point (1,221 Degrees Fahrenheit) and poured it into the basin. It was not until waiting another 24 hours for the part to cool off before I was able to break it out from the sand.

Step 4:
Surface Finishing & Sealing
Turns out that the two halves of the aluminum mold did not match up perfectly, which resulted in more filing of the parts than necessary. Once all of the rough edges were filed down, I then took a grinding tool with a sanding disc to polish around every edge before using it on my next fishing trip.
What I noticed after using the fish holder a couple times is that the smell of fish and blood would stick to the handle, making me realize just how open the pours were in the material, absorbing moisture around it. This proved problematic when I realized that the parts need to have a sealed coating for long term use. My fix for this issue in the short term was to buy a can of Flex seal spray to add a rubber coat to the parts. I lost the polished look that I was wanting, but it did work in sealing the part from any moisture. Now only time will tell how long it will last as a sealant.


What all went wrong and how I would improve the design:
Making the wooden pattern 2-sided added more issues with the flask alignment and caused a need for more filing of part: I would change this by making the wooden pattern 1-sided (3/4” thick) with a larger draft angle.
The tool itself has too large of an opening where the knuckles go: This problem would have been avoided if I took the time in making a prototype first to see how it fit in my hand. I would re-design my drawing/ wooden pattern to make it a skinnier tool overall by shrinking the inside opening.
The sharp pointed hook on the end turned out shorter than the one on the wooden pattern: This is because the gases got built up in the sand casting when pouring the aluminum, which prevented the metal from reaching the point. Adding a gate-like design to the wooden pattern for gases to escape would prevent this.
Flex seal worked as a temporary fix, but at the expense of making the part look worse in quality (no polish), while also knowing that the rubber coating will eventually ware: I would need to take the time to research the process of anodizing aluminum in order to seal the metal pours in a long-lasting way, and keep a clean look on the parts themselves.